AW

Ancient Warfare magazine
Showing posts with label 15mm. Show all posts

Monday, September 5, 2016

Defense in Depth - Testing L'Art de la Guerre

       So, how effective was Roman deployment in multiple lines anyway? Or, more specifically, how well does deploying in depth work using the L'Art de la Guerre rules?

Both armies are deployed! The Romans have a very narrow front, depending on their cavalry to protect the flanks.

       During the Roman republic it was quite a common for Roman armies to deploy in multiple lines - in this case three.
  • The first line was made up of the less well armored hastati.
  • The second line was made up of legionaries with a tad better armored - chain shirts in this case, called principe.
  • The third and final line was made up of not only the best armored troops, but the most veteran - the triari.
One might also count the velites - light skirmish infantry - as a separate line as well, being well positioned ahead of the army ready to pitch their javelins at the advancing enemy.

The Gauls were a good mix of warriors on foot and on horseback.

       Curious as I am, I wanted to see how well my favorite ancient rules hold up using a deployment such as this. I saw right away I would have to make some adjustments to the rules, although minor. For one, I would not be using the standard rules for deploying armies in left, right, and center corps. I would still divide the army in to three corps, just not being so strict as to where each was deployed. In addition, since I would be using only two legions, I decided that each legion would be a separate corps. The third and final corps would be the armies general, consisting of only the two units of triari. These would be positioned in the third line and in the center. Each of the remaining two legions would deploy on the right and left and would both be deployed in two separate lines, representing the first/hastate line, and the second/principe line Each of these two legions also included some non-legionare troops in the form of cavalry - both Roman and Numidian. Each legion also had a couple of units of velites. These were deployed ahead of the hastate/first line. In addition, to avoid front units routing and causing cohesion hits on rear friendlies, I left gaps between each line of just over 1UD each.

       The Gaul army had a nice mix of med. and hvy. infantry which were impetuous. They also have a good number of cavalry on both flanks - more than enough to handle the meager Roman cavalry.


As the attacker in this scenario, the Gaul army surges forward on all fronts, quickly engaging the flanks of the Romans
       Right from the beginning I knew that I would have issues protecting the Roman flanks, preventing an envelopment of the legions - thoughts of Zama spring to mind here. However, I decided to carry on with the battle.


As the Roman flanks are engaged, the initial wave of Gaul warriors crashes in to the Roman defenders. This first wave was made of the med. infantry. Also note the intense and close run cavalry fight on the Roman left. The Numidians went toe-to-toe with the Gaul cavalry here for some time during the battle.

Although the Roman right flank was defeated in detail, the first Roman line remained intact after losing a unit and receiving heavy losses. I knew at this point that I would have to commit some rear line troops to defend that right flank. Not exactly what I wanted to do.

It was obvious to me that the flanks would play a huge role in the battle's outcome. Of course, this is not unlike what occurred historically in many battles.

The Gaul left penetrates deep on the flank of the Romans, pushing back the velites, forcing a unit of triari to commit. Also note the first line of Romans has weathered the initial assault and

At this point, with no on-board camp to worry about, I considered going on the offensive with the legions in order to hasten the fight in the center. However, since this was more of a test to see the value of the defense in depth, I chose to stay back and see how effective the rear ranks would be in defending against flank attacks.

As the main Gaul infantry approach, the rear ranks become more and more engaged as the Gaul cavalry defeat the Roman left wing as well! Both triari have been committed, as well as the second line. Not what I expected.

At this point in the battle the fighting was all over the place. The first Roman line, although battered initially, still was intact. The rear lines were all but fully engaged and committed to the fight on the wings.

The battle was pretty much over at this point, with the Gauls withdrawing from exhaustion. The Roman first line is once again assaulted - this time by the more worthy heavy Gaul infantry.

The Romans are engaged on all fronts! There is no doubt that the Romans at this point were in trouble. However, being less resilient than their opponents, the Gaul forces initial impetuousness was spent. It was only a matter of time before they would fatigue and withdraw from the fight.

       The battle was over. It should be noted that I kept playing the fight longer than I should have. The Gaul army was defeated a tad earlier, but I kept the game up regardless. Even so, it was a close fight for both sides.

       Although the test didn't go the direction I wanted - testing out the defense in depth against a frontal assault, it did show how effective the deployment was at protecting against flank attacks. The Romans were able to shift forces relatively quickly against the less able Gaul cavalry, dealing with them quite effectively.

       Realistically, having a much smaller frontage, the Romans would often deploy rear ranks to extend the front. Optionally, the flanks could have had more troops as well.

       Overall, it was a fun battle. Exciting throughout - as the L'Art de la Guerre rules tend to be, I enjoyed every bit of the fight. Although not having been able to test out the durability of the three lines against heavy frontal assaults - at least in the manner I planned, I did learn a lot about the effectiveness of the system to adapt as needed. I also learned the vulnerability of the flanks! Again, I kept thinking Zama as the flanks each crumbled.
http://www.artdelaguerre.fr/en/index.php?lang=en&PHPSESSID=2ab3235fd56c9c9241a791617fc30a4c
      
       I hope you enjoyed the article. I hope to have another like this soon. In fact, I am already planning some scenario type battles for use with L'Art. More on these in the coming months.

Until next time...

~K


Saturday, January 23, 2016

Some Plans for the NEW Year

Well, after some adventures with my Napoleonics (which I am quite happy with at the moment) I am itching to get going with some plans for my ancients hobby. First up I have quite a ways to go expanding my Gaul and Polybian Roman armies. I try and add a new unit for both every week or so, and so far so good. The painting continues.


Some of my completed ancient armies.
Hosting some LIVE plays over on the Tabletop Commanders has been a blast. Recently I did some Blucher games and learned a lot about how to improve the quality of the videos. For those not in the know, a LIVE play is a game session played LIVE over Google+ Hangouts. For more on this check out the Tabletop Commanders link here on my blog. Anyway, I will be planning a Basic Impetvs battle next month for everyone. Been a while since I last played this awesome system. Although L'Art de la Guerre  is my rules of choice for ancients wargaming, Impetvs will always have a place on my bookshelf. Regardless, stay tuned for that as I will have more information on the details of the event - and results - later.
Another thing I want to finish is my last DBA campaign between the Gauls and the Romans. If you check my past posts here on the blog you will notice I never got around to finishing that last campaign - I think we did two battles so far? Anyway, I definitely want to pick that up soon as well. That campaign, by the way, is a playtest of our two-player campaign rules we have been working on. You can find the latest version of that in the files section here on the blog.

As far as what NEW projects I want to get to this year, I am not so sure. My options are plentiful, that's for sure. I still want to build some NEW armies for the early dark ages, as well as some early Greek stuff. However, first up will be the period that has my attention the most, which is the early republican Roman ear. I already have a start on Later Seleucids and Numidians, two armies which I will be expanding soon. Carthaginians and more Successors (Ptolemaics and/or Macedonians?) will eventually be in the works as well. But again, my hands are full with my current plans, so I will not get ahead of myself yet. Oh, and there is of course my massive re-basing of my Feudal English armies as well! As many of you might know, all these miniatures were mounted for Impetvs. However, I have since lost faith with that mounting system - the bases are just too big and clumsy for me as I like lots of terrain on the table. SO now I am re-basing everything over to the DBx standard. This will take some time.


King Henry III of England: mounted and ready for battle!

Some of my Impetvs based feudal English in need of re-basing.

So there it is; plans for the year - or at least the coming few months. I hope you all stay tuned as I get more and more done and add some awesome content to the blog.


Tuesday, July 21, 2015

Playing Some L'Art de la Guerre ...

Spent the last couple day's finally testing out the L'Art de la Guerre ("L'Art") ancients rules. Taking me a bit wrapping my head around some of the movement rules, which is otherwise a pretty straight forward game system.


The mechanics are pretty straight forward, a good "grainy" feel to them for those looking for more detail compared to DBA. At the same time the game flows very fast. Combats can be very quick and brutal - even considering the "cohesion" rule that keeps units on the table until they reach a certain loss in cohesion - 2-4 points in general. The movement section takes the longest to play out - at least for a newbie to the rules like myself.


All in all I am liking the rules. I have been looking for a good set which is a step up from DBA (which remains my favorite so far - at least for small and FAST games). DBMM and Impetvs still attract me as well. Which reminds me, if you like Impetvs, you may very well like these rules as well - much of Impetvs was drawn from concepts in these rules.


Wednesday, July 15, 2015

L'Art de la Guerre is on the Way!

Been having an itch to give L'Art de la Guerre a test run. Have been giving ancients a break the past couple months whilst I do other things. One rules set I am itching to try is L'Art de la guerre. I did a fist look video on these rules a few months back and have only recently got around to giving them a good read through. - which I am still doing at the moment. However, I am eager to set up some miniatures and run through some test runs. Perhaps I can get to that by next week, Right now my games table is covered with panzergrenadiers, Shermans and of course a robust looking TIGER!

More to follow - including some pics  of my LarT play tests :)

Sunday, June 14, 2015

Making a QUICK Greek or Roman Temple

Here  a short example of how to make a quick temple for your Roman or Greek battles. Emphasis here is on "quick". However, the final product looks really good if done correctly.

(NOTE: I was in a kind of rush making the post. I intend to go back later and tighten it all up a little bit. Until then, here it is :)


I made this little gem primarily because I wanted something to represent an enclave in my DBA battles. One example the rules give is an out of the way temple. So that is the direction I chose. I can use this little temple for any battles along the Mediterranean.

What You Need
 
5-6 (or more) plastic drinking straws
Thick Card
Wood/MDF base, etc.
HO Scale Miniature for a Statue
Foam Ball
Metal Washers (different sizes)
Spackle/Filler
Flock, sand, etc.
Paint White, brown, black, red, etc.
 

STEP ONE: Get you stuff together! One thing you will need is lots a card circles. These are actually easy to make. Grab some thick card, place steel washer (any size you want) and cut around the washer using scissors. When your done you can file the card a bit to smooth the edges. You can also gather any round bases you might have that would make a great platform/base for your statue to sit on. In my case I used a thick plastic round base for this.

For the dome you will need to cut a small round foam ball in half (I didn't have one around so made my own by cutting out a chunk of foam board and shaping it with a very sharp knife and sand paper.


Step Two: Make your pillars! This is what the plastic drinking straws are for. I am making this model in 15mm so my straws are about as thick as I could find. I cut a bunch into lengths of about1 1/2 " - 2"; tall enough for my needs. Remember that 1" in 15mm is approx. 10 scale feet. My roof will be about 1'5 to 20' high.


I made a bunch of these and cut little tabs that flop over so I could adhere them to the card base and roof. Simply make two cuts on each end of your straw pillars, bend down, and cut off the rest of the straw (see pics).


At this point I glued the straws (by those little flaps I cut) onto the floor of the temple. I then assembled the flooring pieces together by stacking them. You have to be careful here to make sure the straws adhere well to the flooring pieces - pressing them all together. You want the straws to stand as evenly and erect as they can. Don't worry too much if they arc outwards a little as the roof piece will pull it all together.


STEP THREE: Assemble the roof! At this point it's time to throw that roof on-top. ( took a single round card piece and glued the dome on-top - be sure to center it up so it looks right.


Next, we glue the roof piece on top of the pillars which should be nice and dry now from previous assembling. Again, we glue the roof pice on to the straw tabs we cut in to the straws - just like we did for the floor. For some added stability I used a few small pieces of tape to hold all together while it dried. Be sure to get everything lined up and straight - you don't want any leaning pillars.


STEP FOUR:  Add the Statue! At this point I primed up my HO scale model to represent my statue. I glued this onto the top base of the floor (again, I used a plastic round base to represent this). I used a brown primer for the statue - a good color for shading an off-white color which the temple will be painted at the end.


STEP FIVE: Paint up and texture! At this point I added spackle over any gaps between floor pieces, where the statue sets on the floor, where the foam dome meets the card ceiling, and around the joins of the pillars and card. The goal here is to smooth things out. Once this is dome we can add some sand to the spackle and cover the entire model with the spackle (adding texture).

Next up we give a nice base coat to the entire piece - using brown or white paint. Brown makes a nice shade or undercoat for any off-white stone work.


The pillars deserved some special attention. I wanted to show that each pillar was made up of stacked smaller stone pillars. To do this I used a brown ink to go around each pillar about five times, thus showing deep recesses between the pieces.


At this point it was time to finish the painting. I painted a black strip at the base of the dome to provide contrast and a shade for the red that would be painted over it. Of course you can use any color really. I like red as it really stands out and "looks" Roman or Greek.

The whole piece was painted with an off-white. I use  pure white to show highlights on the dome top. Once dry I finished off the entire piece by adding flock and what- not. Perfect.


Wednesday, June 10, 2015

Seleucids Getting a DIP!

Recently dipped some of my Seleucid troops to add more depth to them - not to mention that "on campaign" look and feel to them. I am happy with them. However, I must say they did turn out a little darker than I expected. I used mid-tone Army Painter dip so I am not sure why they came out so dark. Perhaps I didn't mix the stuff enough - it has been sitting about for months since I last used it.


Thursday, April 2, 2015

The Gauls Have Arrived!

Finally finished off a DBA army of Gauls this week. All in time for our next DBA campaign this weekend. I had been working on these little guys for a few weeks now in between all my other projects. They are all done now except for some chariots I want to complete and add as an option later.

Gauls poor from the wood. I still have some shields I want to decorate. Good enough for now.


The army here is complete except for the chariot options and some "fast" warband. Out of all the warbands I have for this army, only two elements are "fast", the rest being "solid". I would like to field more and am planning on adding a dozen more "fast" warbands in the future. My goal is to get this army up to Big Battle DBA standards, so I have plenty of room to expand and experiment with element types along the way. This of course will also help me get ready for some test battles using the LADG rules which I am also eager to have a go with. For now, these guys will do.

A village burns on the left as the Romans prepare a defense against the rush.


Not bad over-all. Still have some touching up and some details to add.


I am eager to see how well this army performs in the new v3 DBA rules. With an abundance of cavalry and "solid" warbands I am thinking they should do pretty well against my Polybians. With another playtest of our campaign rules (we added some new goodies to it) coming up this weekend it should be both fun and interesting. We shall see.

The temple looks pretty good. Perhaps I wash will be next for it to tone it down a bit.


Also last week I finished off that Greek temple -makes a great "enclave" in DBA - I have been working on. It Looks pretty good considering it was made out of simple card, plastic straws, and a piece of foam for the dome. I used a 20mm plastic figure for the statue. Quite pleased with the overall look. I may add a wash to it to darken it up a bit. Next up I will be making some Greek houses and some huts (for the Gauls).

The clash is about to occur. Will the Romans do as good against the hordes of Gaul as they did against the Seleucids?


Next up I want to finish off some Numidian allies for my Romans so they have some light cavalry options in future battles. This will help me get a start on my Numidian army as well.


Sunday, March 22, 2015

Update and Things: what have I been doing regarding Ancients Wargaming...?

Quite a bit has been going on around here regarding my ancients wargaming. In between my other interests - and SCHOOL - I have managed to get a few things done/started. Among other things, work continues on some new terrain pieces for my ancient battles. So far I am experimenting with a Greek type temple, as well as making several forts for camps in DBA (and other rules). More pics and details coming soon.


A new camp just built: from TIDDLY-WINKS!


Greek temple made from straws, foam and card. A statue will go in the center.

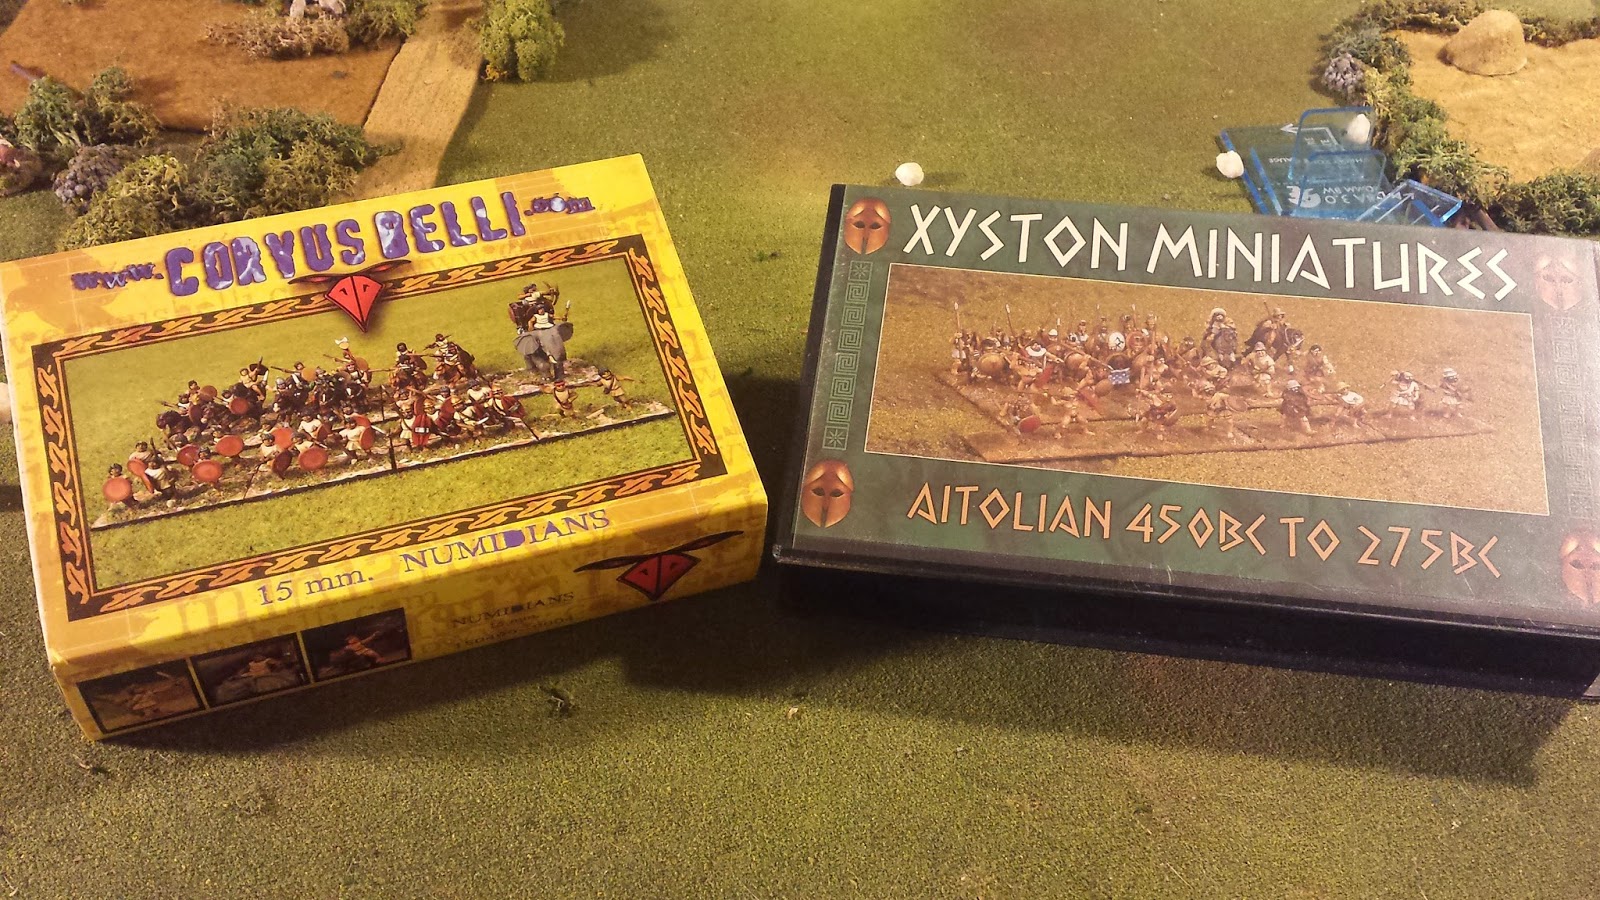
I also just got in some Corvus Beli (Numidians) and Xyston (Aitolian Greek) 15mm DBA army boxes. Very nice indeed. I threw in some extra blister packs as well to round out these little armies. I am particularly fond of the Numidians (an army I believe I will expand for some bigger battles).


Some new minis to paint!

Of course progress continues on my Gauls I have been painting off an on the past couple weeks. A complete DBA army should be complete by the time of our next go with our DBA campaign.


Some Old Glory and Essex Gaul/Celt foot.


My good friend has a pretty good blog for DBA (and other periods) here on Blogger. Head on over to the Splendid Little Wars Blog! to see some good DBA 3.0 write ups! Includes some Big Battle DBA as well. A four part series of write ups has recently been posted. Hoplite Greeks, Persians, Gauls and MORE! Pretty exciting stuff over there if you want to see more DBA goodness :)


Saturday, March 21, 2015

DBA Weekend Campaign - Part Four (Final)

Last battle saw the Romans pull off a great victory over the "marching circus" known as the Seleucid Empire. This next (final) battle was to prove even more decisive in the campaign  - as you shall see.

Again, if you haven't been following along with this four part campaign write-up, this is a play-test campaign of our own rules (very simple). Basically it is a five battle mini-campaign. A side winning three battles in a row will win the campaign; otherwise campaign victory points are totaled and the higher vp total wins. Of course there is some more detail to it all than just that, but that is the rules in a nutshell. I will be adding more detail to the rules later on. For the time being the basics are there and it works great for a ladder style two player campaign.

In case you missed the previous parts:


The Final Battle awaits!

The Final Battle!

Continuing on from the last battle both sides would be equally matched at ten elements apiece. For my own side (the Romans) I would not be using my cavalry or a blade element. The Seleucids would be down their warband ("solid") and Thracians ("fast" aux.). I was not too concerned honestly, although his Thracians were a major pain always threatening my flanks as they were. And of course I won't forget earlier in the campaign how they ambushed some of my hastate in the dark of a wood to slaughter them to a man (with the help of the warband no less). Anyway, this was to prove a very challenging battle for both sides - and a very important one at that. If the Romans could pull off a win here, they would win the campaign outright for winning three in a row. After losing the first battle in an amazing disaster, the Romans have fought long and hard to be this close to final victory.


A look from the Seleucid battle line. That hill was looking like a strong position indeed!

Once again the Seleucid placed the terrain. A small village (hamlet - rough going) was placed along a road on the left. We decided that the village had just been pillaged and set alight (seen by the smoke over the buildings). Astute readers will note that the models making up the village are actually dark age buildings. Until I get around to finishing my current terrain project, they will have to do for now. Other terrain included a small gentle hill (good going), and a small crop field (again good going as a one wasn't rolled for pips in the first bound).


Both the Romans and the Seleucids dispatched light troops along the road to the left. The small burning village can be seen. The Roman camp can be seen at the bottom of the pic.

My plan was very simple: advance as quickly as possible to take control of the high ground (that central hill). The hill would give much advantage to the side controlling it, as will be seen in the battle to come. In addition, I would be sending off my light troops along the road to not only engage the enemy near the village, but also be in a good striking position on their right flank - or their camp if I so wished.

The Seleucid enemy deployed in their standard fashion - pikes in the center flanked by their shock and light troops. Their camp was on the opposite of the road past the burning village. For protection (and to be somewhat of a threat) the Seleucids also deployed their Asiatic archers (psiloi) along the road near the village. Surely I would be able to handle this lot with my velites!


Both armies advance quickly towards the high ground obscuring them. Whoever held the hill would surely have some advantage.

The Seleucids had the first bound as the defender. They wasted no time advancing toward the hill - obviously seeing the value of that position. Both sides therefore wasted no time moving forward. Pips were low for the Seleucids at one point however. Turned out that with but a single pip, he managed to thrust forward with just his pikes to take the hill - the remainder of his army lingering back in what seemed like confusion in the ranks. None the less, the Romans would now need to take the hill the hard way. Jupiter be with us!


With confusion in the ranks, the Seleucids managed to take position of the high ground with their solid pikes. The Romans would have to fight their way up the hill.

At this point the forces were engaged all along the line. The Seleucids had some advantage with their pikes being on high ground. However, their left flank was thrown back from the hill by a strong defense put forth by the Romans on that part of the line. This fracturing of the Seleucid battle line would prove critical later in this battle. Did the Romans learn their lesson in dealing with pike blocks effectively? We shall see.


Meanwhile, both forces engages their lighter troops just out-side the burning village. Roman velites support some aux. troops.

Over near the burning village the forces engaged rather quickly. The Romans had a clear advantage here as they were able to get some flank attacks on the enemy Asiatic archers. Both enemy elements would be defeated after a few bounds of tight combat.

(Rules Note: The Seleucid player really was limited in his pip use. Elephants and scythed chariots love to suck up pips. As a result he couldn't really afford to spend many pips over near the village in this battle.)

(Rules Note: During the combat near the village, we made the error of  counting the Roman velites (psiloi - i.e. "fast" troops) as counting as an "overlap" against the enemy psiloi - Asiatic archer; psiloi of course cannot be overlapped by corner only, which was the case above). It really wouldn't have mattered as the velites could have simply moved to get side edge to side edge contact with the enemy psiloi or - as they did later -  get a flank attack on them with their front edge.)


The lines engage!  The Romans slow the advance of the scythed chariots with their velites while desperate fighting rages all along the line.

The fighting continued all along the battle line. Both sides recoiling and pursuing in to the enemy. It seemed that the Seleucids had the upper had at the mid point of the battle. The Romans were quickly taken down three elements as their left flank collapsed from the assault of the Seleucid elephants and cataphracts - not to mention their pikes with high ground! Things were looking grim indeed.


With the high ground on their side, the Seleucids manage to break through as the Roman left collapses! This as the fighting near the village continues.


As the Seleucid elephants lead the break-through, Roman triari march forward to prevent an all out Roman rout.

Thankfully the Romans (my side) had a reserve in place. These were quickly sent forward to shore up that left flank before all was lost - if anything I would at least prevent an all out rout! The Roman general and some triari were sent forward!

(Rules Note: It was at this point during the campaign that we realized we had been missing something in the rules! It turns out that 4Kn (Knights - which the cataphracts are classed in this case) DO NOT pursue after an enemy recoil! Normal 3Kn do pursue after a recoil. Easy to miss this if you're not paying attention - especially when re-learning the rules!.)

It was at this point in the battle that the Seleucid left began to fall back, even as the right advanced. This would fracture the Seleucid battle line enough for the Romans to isolate those pesky pikes!


The Roman velites and aux. gain the upper hand on the enemy and are in a good position to defeat what foes remain near the village.


With the right holding, the Roman general moves up with the triari to plug the gap on the left! Facing the brunt of the Seleucid assault.

With the Roman reserve committed and holding a failing left flank, the Roman right advanced and managed to eventually destroy the enemy left pike (their whole left flank in fact). The Romans committing their reserve and holding the line paid off! With the enemy pinned, they could do nothing but watch their pike blocks fall apart.


Things are getting critical for both sides as a back and forth struggle begins around the hill! The Romans manage to isolate an enemy pike block, hitting it in the flank with their velites!


The Seleucid general moves to keeps his troops in order. The tide has turned as one of the Seleucid pike blocks is destroyed on the hill after being flanked. In the distance can be seen the victorious Roman light troops near the burning village.

The Seleucids saw this strange twist of fate and sent their general in to action - too late however. The Seleucid battle line was broken! It was but a matter of time before the remainder of their forces were pinned and flanked. That is exactly what was happening. The fate of the campaign itself rested in this battle, and the Seleucids were all but lost at this point. A Roamn victory awaited!


The battle is over, as the last of the Seleucid pikes are destroyed to the man!

With the loss of the last two elements of pikes, the battle had ended. A very close fought engagement indeed! The Seleucids were oh so close to victory! The final score was four to six: a Roman victory!

Final Campaign Score
Seleucid: 3 vp
Roman: 6 vp
 
The Roman losses!


The Seleucid losses.

Notes and Observations: This was a really tight fought battle. Both sides played very hard from start to finish. An awesome way to end the campaign!

I have to admit, I really was concerned watching my left flank fall apart so quick. The Seleucids had the advantage of that high ground and that paid off. They also managed a couple "quick kills" on my blades! All I can say is having that reserve (and all players should have one) saved the day for the Romans. It was a risk sending my general off like that, but again, it was worth it. My spear units also did a good job holding the enemy (although one did get destroyed early on).

As far as the campaign itself is concerned it was a complete success. After some initial bumps in the road, everything smoothed out quite well. The basics to the rules are just right at this point. Now I want to try adding some additional depth to it to add to the fun - will be saving that for the next campaign however :)

Overall I really enjoy the new version of the DBA rules. It has quickly become one of my favorite games of all time - especially now after a successful run through our little campaign. Each battle was set up and played in under an hour - awesome!

I hope you enjoyed this little tale of war here. I plan on doing quite a few more. The next one in fact should be a match up between my Romans (once again) and my newest army - Gaul! I will also have some very nice terrain to add to the layout as well. Looking forward to that. Stay tuned!

Again, in case you missed the previous parts:
Part One
Part Two
Part Three