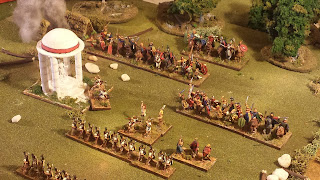
(NOTE: I was in a kind of rush making the post. I intend to go back later and tighten it all up a little bit. Until then, here it is :)
I made this little gem primarily because I wanted something to represent an enclave in my DBA battles. One example the rules give is an out of the way temple. So that is the direction I chose. I can use this little temple for any battles along the Mediterranean.
What You Need
5-6 (or more) plastic drinking straws
Thick Card
Wood/MDF base, etc.
HO Scale Miniature for a Statue
Foam Ball
Metal Washers (different sizes)
Spackle/Filler
Flock, sand, etc.
Paint White, brown, black, red, etc.
STEP ONE: Get you stuff together! One thing you will need is lots a card circles. These are actually easy to make. Grab some thick card, place steel washer (any size you want) and cut around the washer using scissors. When your done you can file the card a bit to smooth the edges. You can also gather any round bases you might have that would make a great platform/base for your statue to sit on. In my case I used a thick plastic round base for this.For the dome you will need to cut a small round foam ball in half (I didn't have one around so made my own by cutting out a chunk of foam board and shaping it with a very sharp knife and sand paper.
Step Two: Make your pillars! This is what the plastic drinking straws are for. I am making this model in 15mm so my straws are about as thick as I could find. I cut a bunch into lengths of about1 1/2 " - 2"; tall enough for my needs. Remember that 1" in 15mm is approx. 10 scale feet. My roof will be about 1'5 to 20' high.
I made a bunch of these and cut little tabs that flop over so I could adhere them to the card base and roof. Simply make two cuts on each end of your straw pillars, bend down, and cut off the rest of the straw (see pics).
At this point I glued the straws (by those little flaps I cut) onto the floor of the temple. I then assembled the flooring pieces together by stacking them. You have to be careful here to make sure the straws adhere well to the flooring pieces - pressing them all together. You want the straws to stand as evenly and erect as they can. Don't worry too much if they arc outwards a little as the roof piece will pull it all together.
STEP THREE: Assemble the roof! At this point it's time to throw that roof on-top. ( took a single round card piece and glued the dome on-top - be sure to center it up so it looks right.
Next, we glue the roof piece on top of the pillars which should be nice and dry now from previous assembling. Again, we glue the roof pice on to the straw tabs we cut in to the straws - just like we did for the floor. For some added stability I used a few small pieces of tape to hold all together while it dried. Be sure to get everything lined up and straight - you don't want any leaning pillars.
STEP FOUR: Add the Statue! At this point I primed up my HO scale model to represent my statue. I glued this onto the top base of the floor (again, I used a plastic round base to represent this). I used a brown primer for the statue - a good color for shading an off-white color which the temple will be painted at the end.
STEP FIVE: Paint up and texture! At this point I added spackle over any gaps between floor pieces, where the statue sets on the floor, where the foam dome meets the card ceiling, and around the joins of the pillars and card. The goal here is to smooth things out. Once this is dome we can add some sand to the spackle and cover the entire model with the spackle (adding texture).
Next up we give a nice base coat to the entire piece - using brown or white paint. Brown makes a nice shade or undercoat for any off-white stone work.
The pillars deserved some special attention. I wanted to show that each pillar was made up of stacked smaller stone pillars. To do this I used a brown ink to go around each pillar about five times, thus showing deep recesses between the pieces.
At this point it was time to finish the painting. I painted a black strip at the base of the dome to provide contrast and a shade for the red that would be painted over it. Of course you can use any color really. I like red as it really stands out and "looks" Roman or Greek.
The whole piece was painted with an off-white. I use pure white to show highlights on the dome top. Once dry I finished off the entire piece by adding flock and what- not. Perfect.


Fantastic how-to, very effective as well. The best thing of all, its dirt cheap to make. Looks really good on your table as well.
ReplyDeleteThanks a lot Ian. It turned out quite well. Hard to find decent models for the era really. Sometimes you have to take a look around the house and come up with something.
DeleteImpressive and creative, looks great!
ReplyDeleteThanks Phil. It was tricky... but turned out well. The only option for me at the time - making one. I am happy with it :)
Delete